It's true, I'm completely rubbish at keeping secrets............. (well only those of the quilty kind!)
You may have seen some of the snippets I've been sharing and wondering what I'm up to..........


Well I had planned on doing a huge Ta Da once the quilt top was complete...but as I've been receiving quite a few emails, I thought I would share the news....
We're going to be running our first Block of the Month Club (BOM), starting this Autumn. This was something that we had wanted to do last year, but opening the shop last September slightly scuppered our plans, the time however is now right...... woo hoo!!
The quilt is called 'A little Happy Year' and it's designed by yours truly. Each months block will celebrate all things seasonal in a patchyworky kind of way. I'll be incorporating some of my favourite blocks and using different sewing techniques including machine piecing, english paper piecing and applique ..... basically everything that I love to do! Don't panic if you're a newby patchworker, I'll be sharing lots of tutorials along the way so that you can join in!
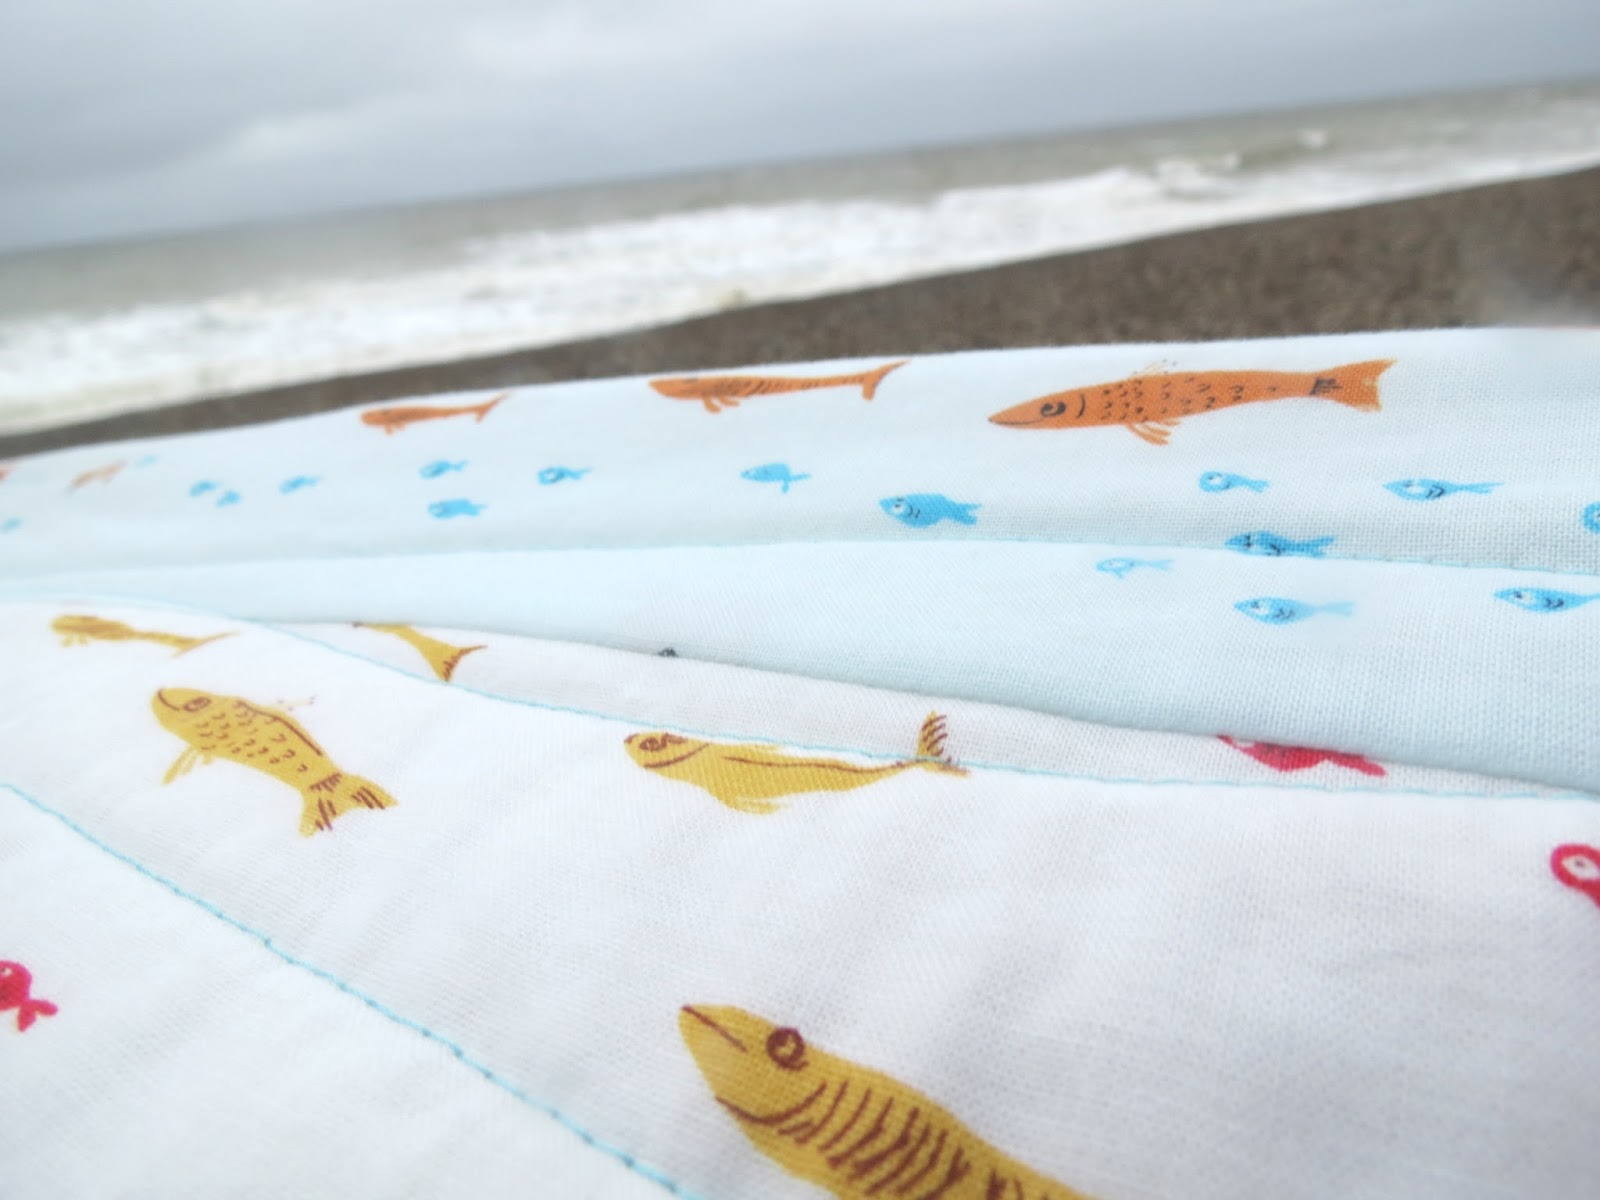
Eagle eyes will already have spotted all the beautiful Tilda. As you know Tilda was the first fabric that we stocked and was the launch pad for our little business, so it seemed fitting to use it in our first BOM. Our intention is for the quilt to be very scrappy, using lots of Tilda fabrics from many different collections, mixed with a selection of low volume blender prints and Bella Solids. The BOM parcels full of loveliness will, as far as possible, feature the same fabrics as I am using. If that's not possible, then rest assured, they will be substituted for something equally as scrumptious!
Places will be limited and we will be starting sign ups on the website soon, once I've (a) finished the quilt and (b) worked out all the fabric requirements (I'm not looking forward to that bit!) We'll be announcing when sign ups start both here on the Blog and also via Instagram, Facebook and Twitter, but so that you don't miss out, I would suggest that you hop on over to the website and complete the little 'register for more information' form which you can find HERE**.
**Edited 20th June ~ Wow thanks so much for all your interest. The 'Register For More Information Form' appears to be a little erratic, I think it is having a little melt down........So Sorry! If you get the 'Error' message, please do Pop me an Email and I'll add you to my list manually. Thank you!
Phew, I hope you're as excited as me.... to be honest I almost wimped out, so please do give me a little wave of encouragement!
You may have seen some of the snippets I've been sharing and wondering what I'm up to..........


Well I had planned on doing a huge Ta Da once the quilt top was complete...but as I've been receiving quite a few emails, I thought I would share the news....
We're going to be running our first Block of the Month Club (BOM), starting this Autumn. This was something that we had wanted to do last year, but opening the shop last September slightly scuppered our plans, the time however is now right...... woo hoo!!
The quilt is called 'A little Happy Year' and it's designed by yours truly. Each months block will celebrate all things seasonal in a patchyworky kind of way. I'll be incorporating some of my favourite blocks and using different sewing techniques including machine piecing, english paper piecing and applique ..... basically everything that I love to do! Don't panic if you're a newby patchworker, I'll be sharing lots of tutorials along the way so that you can join in!
Eagle eyes will already have spotted all the beautiful Tilda. As you know Tilda was the first fabric that we stocked and was the launch pad for our little business, so it seemed fitting to use it in our first BOM. Our intention is for the quilt to be very scrappy, using lots of Tilda fabrics from many different collections, mixed with a selection of low volume blender prints and Bella Solids. The BOM parcels full of loveliness will, as far as possible, feature the same fabrics as I am using. If that's not possible, then rest assured, they will be substituted for something equally as scrumptious!
Places will be limited and we will be starting sign ups on the website soon, once I've (a) finished the quilt and (b) worked out all the fabric requirements (I'm not looking forward to that bit!) We'll be announcing when sign ups start both here on the Blog and also via Instagram, Facebook and Twitter, but so that you don't miss out, I would suggest that you hop on over to the website and complete the little 'register for more information' form which you can find HERE**.
**Edited 20th June ~ Wow thanks so much for all your interest. The 'Register For More Information Form' appears to be a little erratic, I think it is having a little melt down........So Sorry! If you get the 'Error' message, please do Pop me an Email and I'll add you to my list manually. Thank you!
Phew, I hope you're as excited as me.... to be honest I almost wimped out, so please do give me a little wave of encouragement!