28 August 2016

Lovely Little Patchwork ~ Cross Stitch Sewing Book


I'm very excited today to be part of  Kerri Horsley’s Lovely Little Patchwork Blog Tour!   You may remember me telling you all about this super book back HERE, when I made the gorgeous 'Back to School Pencil Case'.  There are so many lovely projects inside the book, published by Tuva Publishing, choosing just one was always going to be difficult!

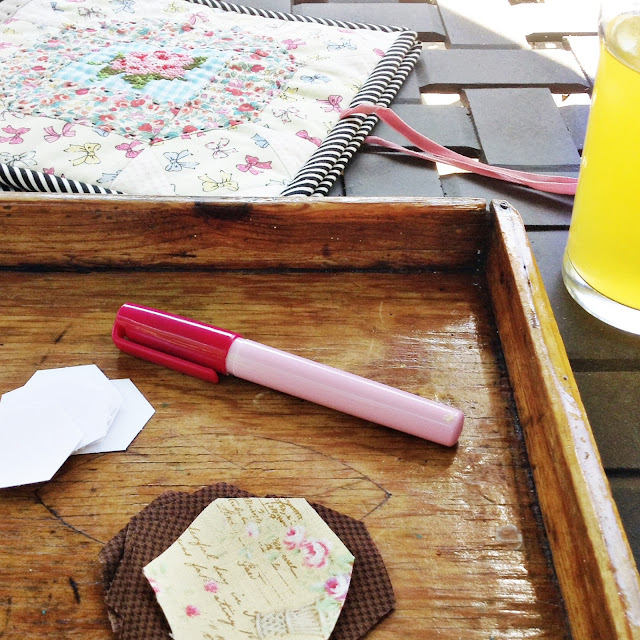
After much deliberation, I plumped for the Cross Stitch Sewing Book, which I'll use for my ' a hexie a day project '.  Don't be fooled in to thinking this is just another needle book (not that one can ever have to many needle books!)...this really is book size and has so many pockets to keep all your notions in when you're sewing on the go!

First of I pulled some pretty fabrics.  I knew as a starting point, I wanted to incorporate one of the bow prints and the polka dot little ladies from the Old New 30's collection plus those super sweet labels from Merry Bon Bon both by Lecien.  I then added in one of our new pretty Sevenberry florals, a sewing related text print by Moda and a host of blender prints to co-ordinate.......this was my initial fabric pull, which did evolve and change slightly as I was making the sewing book.....
As the name suggests, the pattern calls for a cross stitch rose to be embroidered on to gingham, as a show piece on the front cover.   I used the basic 1/8" gingham in aqua by Riley Blake.  One of my chums on Instagram, advised that this form of embroidery is called Chicken Scratch, which if you pop over to Pinterest, you can see some wonderful examples.  I absolutely loved stitching on to the gingham, definitely a technique that I will do again, but to be honest, the last time I followed a cross stitch pattern, I was in my teens and I made a basic mistake.  Rather than starting from the centre of the design, I started from the lower left corner (obviously watching Team GB at the Olympics whilst stitching cross stitch at the same time is beyond me!) which resulted in the rose being off centre!  Rather than unpicking, to rectify I added a few extra artistic stitches (Sorry Kerri!) and all was well! For the cross stitch, I used 3 strands of Aurifloss.
The rest of construction passed without any further hitches, both Kerri's instructions and the pretty diagrams and photographs are very easy to follow.  My only slight deviations from these was the addition of extra low loft wadding to the pockets and sewing the felt down in its entirety, rather than a line of stitching down the centre seam.
I love all the little details Kerri added to the design which is makes it just that extra bit special, such as the binding on the pockets and the 1/2" hexie flower.  Inspired by these I added the hand quilting in 12 wt Aurifil.......


and on the back cover, I made a pretty fabric label, which again I enhanced with some contrast hand stitches and a vintage button from my button tin.
I finished making the sewing book just in time to take on holiday with me.  Mum (Penny) has been home alone in the shop holding the fort and we've just had the most terrific week in Norfolk... no surprise there, you know it's our favourite place to go!  The weather has been absolutely brilliant which made up for a not quite so brilliant holiday cottage, but never mind our spirits can never be dashed when there are glorious beaches and the sun is shining!
One of my favourite quotes by William Morris 'Have nothing in your houses that you do not know to be useful, or believe to be beautiful ' matches both this sewing book and so many of the projects in Lovely Little Patchwork perfectly and I can highly recommend it!


The Blog Tour started yesterday with Amanda at Jedi Craft Girl and continues until the 25th September, with a whole host of talented bloggers, designers and Kerri herself.
Here's the schedule
27.08.2016Amanda Niederhauser @jedicraftgirljedicraftgirl.com
28.08.2016Sarah Edgar@sarahedgarprettyfabricsalittlehappyplace.blogspot.co.uk
29.08.2016Heidi Staples@fabricmuttfabricmutt.blogspot.com
30.08.2016Megan Jimenez@QuiltStoryMegquiltstory.blogspot.com
02.09.2016Cheri Lehnow@tinkerellentinkerwiththis.blogspot.com
03.09.2016Ange Hamilton@alittlepatchworkalittlepatchwork.wordpress.com
04.09.2016Sedef Imer@downgrapevinelanedowngrapevinelane.com
05.09.2016Kimberly Jolly@fatquartershopfatquartershop.blogspot.com
06.09.2016Samantha Dorn@aqua_paisleyaquapaisleystudio.com
07.09.2016Ayda Algın@cafenohutcafenohut.blogspot.com
08.09.2016LeAnne Ballard@everydaycelebrationseverydaycelebrate.blogspot.com
09.09.2016Sharon Burgess@lilabellelanelilabellelane.blogspot.com
10.09.2016Lauren Wright@mollyandmamamollyandmama.com.au
11.09.2016Kate May@thehomemakerythehomemakery.co.uk/blog/
12.09.2016Debbie Homick@happylittlecottage1happylittlecottage.blogspot.com
13.09.2016Wynn Tan@zakkaartzakkaart.blogspot.com
14.09.2016Kim Kruzich@retro_mamaretro-mama.blogspot.com
15.09.2016Jennie Pickett@cloverandvioletcloverandviolet.com
16.09.2016Veronica AM@VividFelicityvividfelicity.wordpress.com
17.09.2016Nadra Ridgeway@ellisandhiggsellisandhiggs.com
18.09.2016Amanda Woodruff@acraftyfox_amandaacraftyfox.net
19.09.2016Minki Kim@zerianominkikim.com
20.09.2016Sharon Yeager@daisycottagequiltingInstagram
21.09.2016Peta Peace@shequiltsalotshequiltsalot.com
22.09.2016Sarah Scott@piccolostudio_sarahpiccolostudio.com.au
23.09.2016Kristin Cobb@goobadesignsInstagram
24.09.2016Erin Cox@whynotsewquiltswhynotsew.blogspot.com
25.09.2016Kerri Horsley@sewdeerlylovedlovelylittlehandmades.blogspot.com

I can not wait to see what is made each day!

You can also follow the Blog Tour on Instagram by searching the following hashtags

#lovelylittlepatchwork  #lovelylittlepatchworkblogtour

See you again soon...my pile of  'A Hexie A Day' flowers has been growing nicely and I can not wait to share my progress!

Share:

19 August 2016

A little happy Tutorial ~ English Paper Piecing ~ How I Baste and Sew EPP Hexie's


As promised yesterday in my introduction post to my 'A Hexie a Day' project, I'm sharing today the two different methods that I use for basting and sewing my hexie flowers.

Before I do so I thought I would just mention how I cut out my fabric.  Generally I sit down to do my English Paper Piecing (EPP) on an evening, once everyone is fed and watered and as a way of relaxing.  9 times out of 10, I simply cut out my fabric by holding the EPP hexie paper on top of the fabric with my left hand (I'm right handed) and using scissors cut out eye balling a generous 1/4" seam allowance.  Possibly the biggest enjoyment of the whole process for me is choosing my fabrics for each flower, this way I get to cherry pick what I want in comfort!

You can of course if you prefer cut out using a rotary cutter and ruler.  On that rare occasion I'm organised ahead of time, this is how I like to do that, the benefit being that you can cut out multiple layers in one go, ideal if you require multiples of hexies in one colour, for example if you're planing to add paths around your flowers.

First off, I cut strips of fabric slightly larger than I need.  Then I place my hexie paper on top of the fabric and place my quilting ruler along one of the edges, allowing a 3/8" seam allowance.  I then cut the excess away.

I then move on to the next edge and repeat the process and finally work my way around all 6 edges.

Moving on to basting, first up is my preferred method for thread basting hexies up to 1".  For hexies larger than 1" I thread baste through the papers like this

I find that whilst this means that you have the extra job of removing the basting stitches, it holds the papers firmly in place whilst you're stitching.

For hexies 1" and under I use the following method.  For the purpose of this tutorial, I have used black thread, so that it showed up clearly in the photographs.  Ordinarily I choose a thread colour that blends with with my chosen fabrics as the basting stitches are not removed.  I'm in the 'I'm using cotton fabric so use cotton thread camp' and my thread of choice for both my basting stitches and for sewing my EPP is 50wt Aurifil.

Hopefully the pictures pretty self explanatory but  just to clarify, I thread my needle with a piece of thread measuring from my elbow to my finger tips, just as my nan taught to me and knot the end.  Then I firmly fold the two sides of the fabric over the edges of the hexies.  The key to accurate EPP is to have accurately cut papers and then for the fabric to be be basted accurately, that way your shapes will join together neatly.  Starting from the corner inbetween the two folds, stitch a little loop to secure the fold in place, then move on to the next corner, fold the fabric, sew a loop over the corner and move repeating the process until you have secured all 6 corners, then knot off.  In my haste to share this tutorial, I forgot to hole punch the papers before basting.  The addition of a hole allows you to remove your papers more easily.


Now glue basting....

As before, I think the pictures speak a thousand words, but my top tips for glue basting would be not to over do the glue, too much and getting the papers out is a devil.  I tend to use one swipe of glue, don't panic, it goes on blue and dries clear.  Fold the fabric with intent, so that it wraps tightly around the paper, but not distorting the shape of the paper.  I have a small tray and I find it really useful to have it on my lap and glue baste on an evening (whilst watching tv!)


When it comes to stitching the hexies together, the process is exactly the same as I did for my EPP Dresdens, which you can see HERE.  Just as reminder, my top tips would be, to start stitching a smidge in from the end (can you see my starting knot on the left hand side of the hexie below) and then work to the edge and back again and use lots and lots of tiny little stitches, which just nip the fabric.

EDITED I have received lots of questions regarding the best needles and thread to use...,my favourite combination is Clover Black Gold needles and Aurifil 50wt thread....take a look at THIS POST which has more information about this.

 can you see that even this example where I used black thread, the stitches are hardly visible.

So which method is best.  As with all patchwork and quilting I truly believe there isn't a right or wrong, it's down to your personal preference and what works for you.  In my opinion for what it is worth, I would say

Glue Basting
Pro's ~ Its super quick and easy
Con's ~ There is the additional cost of a glue pen and refills.  The papers do not last as long.  

Thread Basting
Pro's ~ The papers last ages and ages and ages and........
Con's ~ It takes a lot longer to do

The decision is yours.

Finally I thought I would share the order I stitch the hexies together to form the flower


I stitch 1 to 2, then add 3, then 4 and so on.  You will find that you will need to gently bend/fold the hexies the more that you add to the flower, as you stitch the corner Y seams, that's fine don't worry.  I also like to give the hexie flower a good press after, before joining them all together.

I hope that all this has been helpful, please do feel free to email me with any questions or leave a comment and I'll reply as soon as I can.

Finally don't forget to use the hashtags

#prettyfabricsandtrims   and    #ahexieaday

for your projects.
Share:

18 August 2016

A Hexie a Day


The other day I had a little a thought, which in turn led to me grabbing some pretty fabrics and paper pieces when I was in the shop ......my thought was, that I could sew one hexie flower every day (or so)...for a year (or so) which will in turn become the most glorious quilt.....yes I thought, that might be achievable.  We are obviously NOT going to mention all my other works in progress!
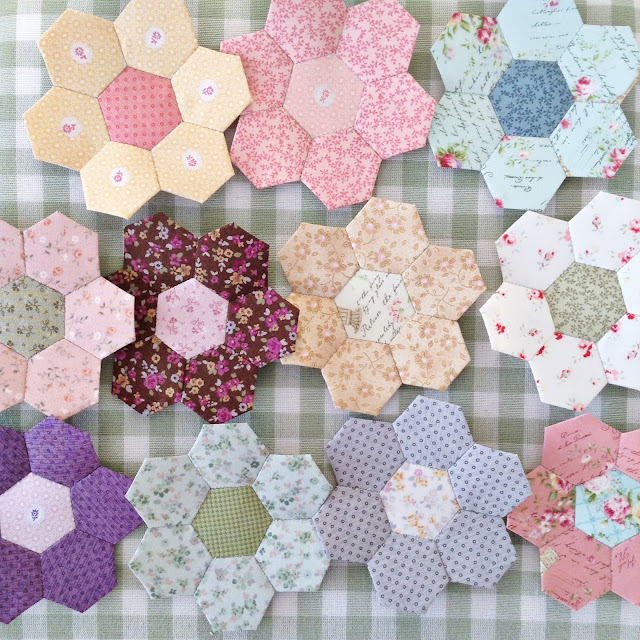
So each day since then I've been stitching a little flower and watching my pretty stack of flowers grow.....


I decided after much deliberation to use upon 3/4" papers which I'm really enjoying the size of, they're nice and sweet but will come together quicker than 1/2" paper which I toyed with.  I do love working in a fairly small scale.  In my humble opinion I find them easier to stitch together, the downside being that it takes longer to grow the size of the finished quilt.

The fabrics I chose are Lecien and are a mix of their Mrs March, Rococo and Sweet, Durham Quilt Collection and their Quilters Basic collection.  Its a very gentle and relaxing scheme to work with.

Rather than thread basting which I have always historically done with hexies, I am glue basting.....I do feel a little guilty it must be said as I've always been a thread baster, but what you can not argue with is the process is definitely quicker, which for me at this precise moment in time is what I need.  I'm using 50wt Aurifil thread and Merchant and Mills straw needles to stitch them together.

I'm planning eventually on sewing the hexie flowers together like these Tilda ones I did a couple of years ago.  I'll probably do this once I have a months worth and a good even mix of colours.  The Tilda ones were half inch hexies, which were thread basted.  This little piece by the way is in the shop and I think is probably the most picked up piece out of everything that I have made, that is on display.....one day I'll maybe finish it, who knows.

This is the back, so you can see all the thread basting......


What I do love about this method is that the seam allowance are held in position even after the papers have been removed.  I still love this method when I'm making 1/2" hexie flowers that are going to be appliqued, like this one I did the other night for another little project I'm working on behind the scenes....


I've already shared my 'A Hexie a Day' project on Instagram and rather excitingly some other ladies are now stitching along yay....and I would love it if you would like to join in too....the more the merrier hey!  

I've also had some emails asking me how I baste and stitch them, so I thought I would put together a couple of step by step photo's showing both my thread basting and glue basting methods, so you can decide which  method you like the best.  I'll share these tomorrow.

If you would like follow my progress on social media, as well as my normal hastag #prettyfabricsandtrims I am also using the hastag #ahexieaday 

Finally what I would say is that I aiming for one a day, but if I miss a day then so be it, this is going to be a fun, slow and relaxing project!

Scrummy Supplies

Lecien Fabrics can be found HERE
Paper Pieces can be found HERE
Glue Pens and Refills can be found HERE
Aurifil Thread can be found HERE
Share:

15 August 2016

Sweet Orchard Blog Hop

  
A little while ago, I had an exciting email from Sedef from Down Grapevine Lane, asking if I would like to join her and Riley Blake Designs on the Sweet Orchard Blog Hop. Having thought about it for about a nano second, I replied YES please, obviously trying to sound keen, but not over keen...you know, a girl needs to be cool!  Sweet Orchard is Sedef's first fabric collection for Riley Blake and it is so pretty, I know it is the start of many beautiful collections to come!  There are 21 fabrics in the collection, pretty florals, text prints, diagonal stripes and the most fabulous cheater prints., in a cheery pink, aqua, grey, red, green and yellow colour scheme.  I particularly love the cheater prints as they add so much more to the collection.  Obviously they can be used as is for your projects, add a bit of quilting and who would know that they're a cheater print ( I won't tell...pinky promise!)  but they also offer wonderful fussy cutting opportunities which is what I used them for.

So would you like to see what I made with the Fat Quarter bundle that was kindly sent to me..............


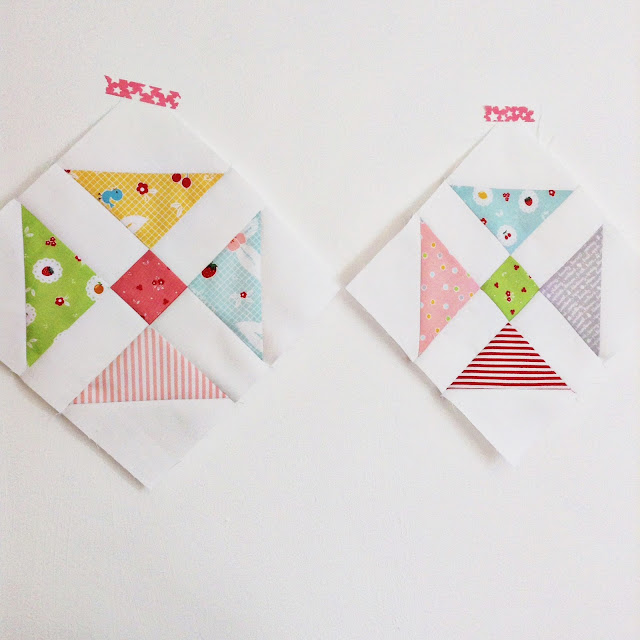
I knew straight away that I wanted to make a quilt, which eventually will be for Poppy.... once it's had a little holiday in the shop that is!  I wanted to use just one block and went for a Five Patch Shoo Fly. You know when people say say simple is best, on this occasion, they are so right!


I had planned on same colour blocks, but as soon as I started making all the half square triangles (HST) and playing with the layout, I just knew it had to be scrappy.  I used those fabulous cheater prints for all the centre squares and cornerstones.  

Here's a better picture so you can see the whole thing.  I'm so pleased with the outcome and I'll be putting together 'a little happy tutorial' soon so that you can make one too.


Once I had made the quilt, I had lots of HST triangles left over.... obviously I couldn't just leave these, so I grabbed a few and made some pinwheels, I just love pinwheels!

I used to these to make a generous size pouch.  (For the construction you can not really go wrong if you follow this tutorial by Anna at Noodlehead.)  It's big enough to hold my Mini Ipad, plus some sewing, so it will be great to grab and go, when I'm sewing on the go.  I couldn't resist making a label with another one of the squares from the cheater print, linen and some sweet little hand stitches.


I also added a little apple button to the zipper tab!

 All in all I'm super happy with my makes and for the opportunity to sew with Sedef's beautiful fabrics!  Thanks again for inviting me.  Sweet Orchard has just been released and for those of us the UK will be due in the next few weeks, (we have the full collection coming to the shop!).


The Sweet Orchard Blog Hop starts today and is running until the 26th August.  Today I am joined by Nadra from the blog Ellis and Higgs you should see what she's made, and tomorrow Jemima from Tied with a Ribbon and Anorina of Samelia's Mum, who will all be sharing there wonderful makes with Sedef's fabric, so be sure to take a peek!

See you again soon!


Share:

9 August 2016

The Flirty 30's Club ~ June's Dresdens (Ahem)

Ok, so it may not actually be June, but honest guv' I did start them then....anyway I won't make excuses!  Determined to get caught up, they came away with me a couple of weekends ago.  (I don't know about you, but I can't even contemplate being away with no sewing to hand!)  We made a fleeting visit to Cumbria to celebrate my Father in Laws Birthday.  We drove up Friday and spent Saturday in the Lakes. We had a lovely pub lunch and then spent the afternoon in Keswick, it was my first visit and what a gorgeous town it is with lots of lovely shops!  We then walked down to Derwentwater, which is just breath taking (sorry the photo's are not brilliant, I forgot my camera).......


Andy and I came home Sunday.  The children stayed for the week and had a marvelous time... I think Grandma and Granda should just about be recovered now!

Anyhow, I have now finished June's Dresden's, do you want to take a peek........


........and last night, I even made a start on July's Dresdens.... just in time for August's 'The Flirty 30's Club' parcels which are being posted tomorrow!

If you would like to join the club, you can do so HERE and for instructions on how to make the Dresden's, take a look HERE.


I'll see you again soon  ..... I may have started another work in progress, what's one more hey......but more about that next time!


Share:
© A Little Happy Place | All rights reserved.
Blog Layout Created by pipdig