21 December 2016

Birthday Celebrations and Christmas Preparations


Last Saturday, Poppy turned 9.... how did that happen, I wonder!  We had a lovely day, pottery painting, followed by a Birthday lunch....Italian meats, olives, french stick ...very Continental....Poppy's choice!

One of Poppy's favourite past times is watching cake tutorials on You Tube, so together we had grand plans for  a semi naked drip cake...can I just say be warned..... to a group of 9 year old girls, the thought of having a 'naked' cake, does cause quite a bit of sniggering and hilarity!  We started the prep a couple of weekends ago and we had a lovely morning making sugar paste flowers and meringue kisses.   This meant that in theory, all that was left to do was to bake the cake and decorate it, which after an incredibly busy lead  up to Christmas seemed a sensible plan.  The cake did of course HAVE to be chocolate and for the sponge, I used the Brooklyn Blackout cake recipe from The Humingbird Bakery cookbook, but substituted the 'chocolate custard' filling for their cream cheese frosting...yum!!

All was going well, cake baked and frosted on Friday night (tick), so all that was left to do, was to add the chocolate drip and decorate it on Saturday morning.  I made a chocolate ganache, which I have done a zillion times and horror of horrors it split.  Thankfully 'google' came to the rescue and I was instructed to give it a whizz in my food processor with a little warm cream, which thankfully bought it back to a glossy creamy sauce...yay.  Unfortunately, because I had used double cream, it also thicken it, hence my rather thick splodges rather than delicate drips.  Not quite what I had in mind, it was handmade after all, great fun to make and oh my goodness, it tasted divine!

You'll remember from previous years, that I started making Poppy a Birthday Rosette.  This years, was a speedy Liberty of London affair, made using precious scraps from my stash.  I have a bag full of pretty scraps that I Bondaweb in readiness for such occasions or little applique projects.  If you fancy making one you can find the 'a little happy tutorial' for it HERE.

We had a brilliant weekend with lots of visitors, lots of goodies eaten and lots of happy memories made!

Now the Birthday celebrations are over, we are all looking forward to Christmas and the countdown is on .... 
The tree is up and is full of decorations..... each one has a special memory attached to it.  I love the moment when you unwrap them and think about when you made them, where you purchased them or who gave them to us......
Each year we add a new decoration or two......
...and of course I love adding all the decorations that I've made over the years...I really love this years Christmas Stocking Garland...... find out how to make it HERE...  
my 'Let is Snow' embroidery, made using the FREE pattern which you can find HERE.....
and snuggling under the Simples Squares Quilt I made HERE.
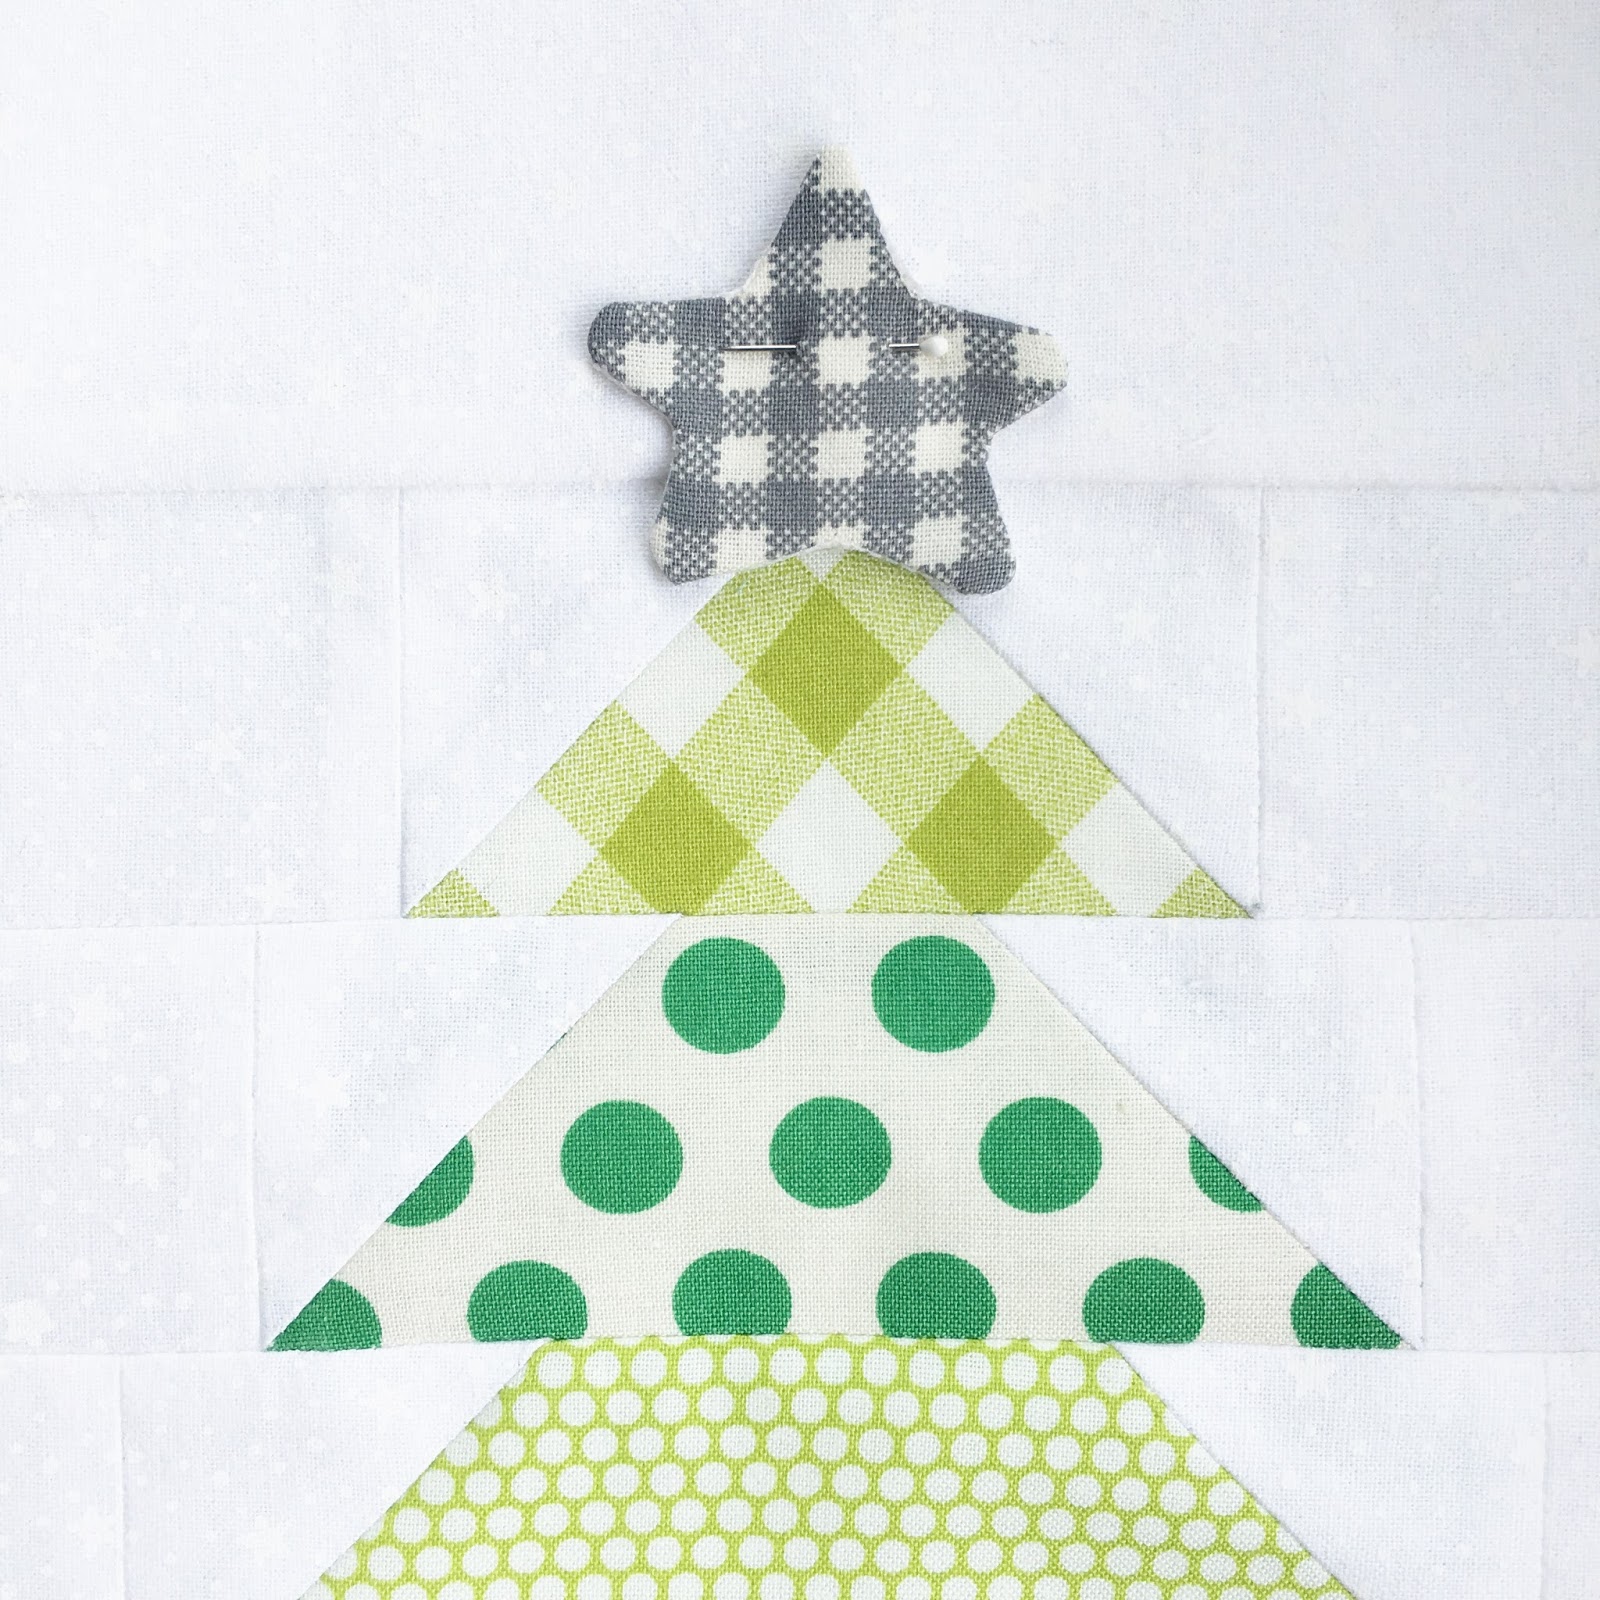
I'm also busy behind the scenes working on my 'a little happy Christmas' quilt which will be our brand new Block of the Month starting in February.  
Before I sign off for some family time this Christmas, here's a little shop update for you, the Ruskington shop is now closed until the New Year, it opens again on Wednesday 4th January at 9:30.  The website will be open throughout Christmas and New Year and we'll be popping in and out to get your parcels full of loveliness on their way, but please do allow a little extra time during the festive period.

It has been an amazing, exciting, super busy year for Pretty Fabrics and Trims, so I just wanted to say on behalf on mum (Penny) and I, THANK YOU SO MUCH for all your support, we really do appreciate each and every order that you place with us and it really does make our day when share your projects that you've made with your goodies with us.  Thank you...thank you...thank you!!

So all that is left to say is have a very Merry Christmas and I'll see you in the New Year!
Share:

14 December 2016

Festive Happy Stitches ~ Tilda Dolls


It was my Saturday off from manning the shop and despite having a zillion works in progress I felt the need to do some frivolous sewing, happy stitches just for me and I knew exactly what I wanted to make, Tilda dolls, well Tilda Pixies to be exact.  I wanted them to be dressed in traditional festive reds mixed with linen, so I grabbed some French General petite prints and some of their gorgeous wovens, plus added in a few bits from my stash and away I went.  I had SO much fun and the hours spent making them whizzed by in a flash!

Both pixies were made using patterns from the book Tilda's Christmas Ideas.  The boy pixie was made using the Santa doll pattern.  I pretty much followed the pattern but customised the clothes ever so slightly......... to make his top, I shortened the coat pattern and omitted the ruffle around the bottom and his trouser were as per the pattern, but I didn't gather them in to a cuff.   Obviously I knew the OCD was kicking in when I found myself pattern matching the stripes on his top..........
The girl pixie was made using the Pixies pattern and the only change being, that I used two different fabrics for the arms, to create the look of a jumper under her dress.

When it comes to making Tilda dolls, the process for making the bodies is that you trace around the pattern pieces on to your fabric, sew on the drawn line and then cut out, allowing at this stage for the seam allowance.  My 'a little happy tip' is to use Freezer Paper for the pattern pieces, which saves you the process of having to trace around the pattern pieces on to the fabric.  You simply iron the Freezer Paper on to the fabric, stitch really really closely around it, cut out allowing for the seam allowance and then peel it away.

I used one of my favourite tools, a chop stick to help stuff the dolls.  I personally like to stuff mine quite firmly, so make sure you allow plenty of time for this step!  (cake and tea are essential supplies!!!!)
My absolutely favourite part of doll making is adding all the little decorative details......


.......it really is SO MUCH FUN!!!!
I now plan to make more Tilda dolls as it seems so sad to pack these little pixies away after Christmas!  

I hope that you're finding a little time to enjoy some happy festive stitches too!  See you next time!
Share:

5 December 2016

A little happy Tutorial ~ Interfacing Method Appliqued Star


Sorry folks.... no prizes for guessing what this months block was going to be in our current Block of the Month 'A Little Happy Year' !  It had to of course be the Christmas Tree.  The tree itself is quite easy to piece, however this month sees the first little snippet of applique.  As I've mentioned before, my favourite method of applique is the interfacing method and it is what I use for the Christmas trees in our Merry Christmas Sew Along, you can find my tutorial for that HERE.  

I thought however it would be useful to recap those instructions not only for our BOM members but also for my other readers who may find this useful.   Where our little star differs from the triangles I made previously is, that the star has some pesky inside corners, so I'm going to show you how to deal with those.

First off you will need to gather your supplies...you will need a star template (mine as you can tell from it's rather raggedy state has seen a lot of action!), some Lightweight 'sew in' Interfacing, I use THIS ONE and fabric for your star. Make sure both the piece of interfacing and fabric is approximately 1/2" bigger than the star template.

To start, trace around the edge of the star on to the interfacing.  Make sure the line is clearly visable, I use my Frixion marker for this as I know that the lines will disappear when the finished applique is ironed.  

 Place the interfacing on top of the 'right' side of the star fabric.  Starting on one of the stright edges, slowly machine stitch on top of the drawn outline.  I use a fairly small stitch (it's 1.8 on my Janome Horizon).  The key with this is to go nice and slowly!!!  When you've gone all the way round, sew over your first few stitches to secure them.
Trim around the sewn edge allowing a scant 1/4" seam allowance.  Here's the bit where you need to be a little bit daring, but balanced equally with a little caution.  Trim away the excess fabric at each of the five points, but make sure you do not go TO CLOSE to the stitches, otherwise it will all come apart.  On the inside corners, you need to cut out a little 'V' which will ensure that once turned through, there will be no unnecessary wrinkles and you star will lay flat.  You also need to cut a small cross into the interfacing only to allow you to turn the star through.
Carefully turn the star through the interfacing, I find a wooden chopstick absolutely brilliant for this.  Again you need to balance gusto with slight trepidation, given those points a good shove, but make sure you don't push your chopstick through the interfacing.  This is one of those tasks that the more you do, the more you get a feel for it and believe me you will be really pleased that you persevere with this process when you see the finished appliques!!!  Don't expect the pointiest of points, your aiming for a soft curvaceous point.

Here's mine before it had a nice press........

 .....and here it is after a gentle press of the iron (on the fabric side NOT the interfacing side), pinned using one of my favourite notions, a Clover Applique Pin.  (You can see more of my favourite notions HERE)
All that is left to do is to hand stitch the star in place.  I use Clover Black Gold Applique needles for this.  Pick a thread colour to match your applique rather than the background fabric, I use 50wt Aurifil thread for this and teeny tiny whip stitches.

A little happy tip...... For a lovely neat finish, I bring my needle up from the back of the background fabric skimming the side of the applique, rather than directly into the applique.  I then sew into the applique fabric and not through the interfacing.  Then when you take the needle back down into the background fabric it will sandwich the interfacing underneath, entirely out of sight. 

Our 'A little happy Year' Block of the Month is, I'm afraid, fully subscribed, but if you fancy joining our new Block of the Month 'A Little Happy Christmas' which will be starting in February 2017 make sure you sign up to receive all the updates HERE!  You can read more about it on THIS blog post........and here's a little peek of some more of the blocks I'm working on .....


Happy Stitches!

Share:
© A Little Happy Place | All rights reserved.
Blog Layout Created by pipdig